|
CMB INSTRUCTIONS 6
Torpedo |
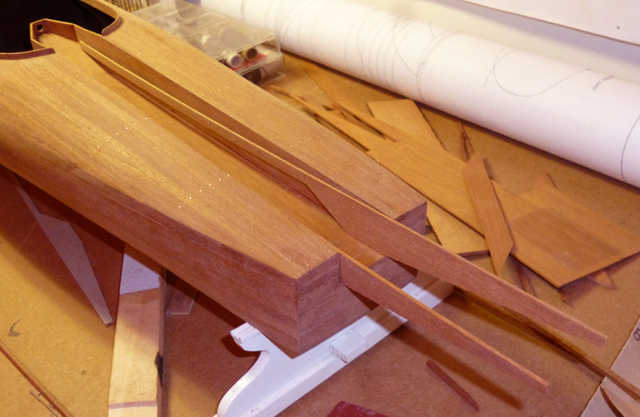
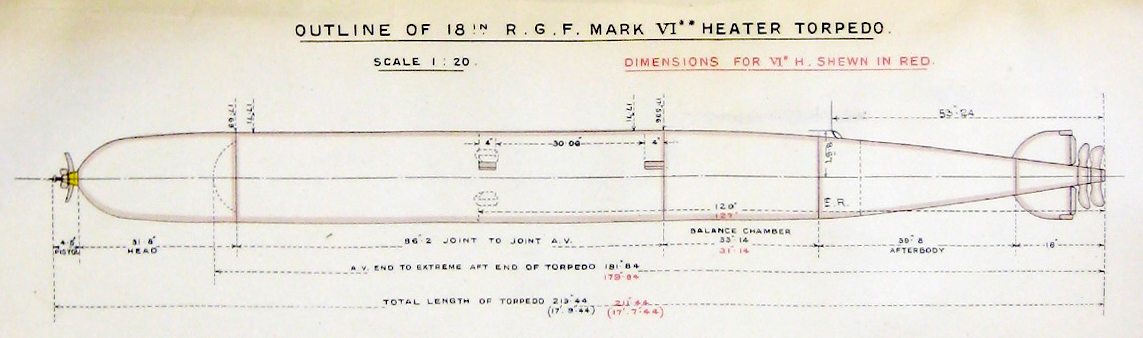
| The torpedo shown in
the plans is an RGF (Royal Gun
Factory) 18" Mk VI. The model torpedo is turned on a lathe from a piece of suitable fine-grained wood. I found a precise reference online (above) allowing me to check the profile and add some grooves for more realism. I had no way to make the brass 'bell' that pushes the torpedo backwards, so it was incorporated as part of the torpedo. Torpedo and 'bell' will be painted different colours in the final model. (Note that the following photos were taken at various stages so the boat appears out of sequence)
|
.jpg) |
|
The diameter of the torpedo is very important - it must
fit exactly with room either side for the launching rails (see below). Make the ram from brass rod and tube, and use it to check alignment. It should hold the front of the torpedo just above the bottom of the trough. The front of the ram is supported by a small wooden block fitted just under the front deck. |
.jpg) |
|
Coats of grey primer are painted on and
sanded down until the finish is perfectly smooth. When the body of the torpedo is complete, you'll need to make four small lugs for the sides (see them on the diagram at the top). These support the torpedo on the launching rails and control the height it sits at, so be very careful with positioning. |
.jpg)
|
|
Before spraying the torpedo its final
colour, make the fins from plastic card and glue them on. Real torpedoes are silver-grey but I chose satin black for a nice contrast with the mahogany.
The bell section is sprayed gold to represent brass. Again the ram is being test-fitted because everything must align perfectly.
|
|
| The launching rails aren't fitted yet because they're vulnerable to damage, but you must allow for their thickness when making the torpedo and fins. Note the shape where they run inside the trough, and get the height exactly right. Remember that later they will be topped with thin brass strips. |
|
|
|
.jpg)
.jpg)